Language Labels
Introduction
This section shows you the list of all the labels shown in the Admin Panel of the proejct. User will see this option only when the project is multilingual. This includes system labels as well as customized labels for the proejct.
View List of Language Labels

- Language Label : Just like any other label, it's a lable to identify it.
- Title : This is the actual Value/message that you want to show in the project.
- Module Name : Name of the module where to display it
- Page : Page where the label is to be shown
- Status : It can be either Active / Inactive. Only Active labels will be shown in the project.
- Actions : Delete and Edit - these two actions can be taken.
- Add New : This will redirect the user to add new Language Label. View Add New.
- Delete : This will delete the selected record.
- Active : This will make the selected records Active.
- Inactive : This will make the selected records Inactive.
- View All : It will display all the messages.
- Translate Labels : Explained below
- Sorting : Clicking on any column head once will sort the records in ascending order while clicking one more time will sort them in descending order.
- Searching : Filtering of records for quick search is possible with this option at top right corner. Searching with below fields are possible:
- Language Label
- Title
- Module Name
- Page
- Status
Translate Language
If you want to translate the language to any other selected language then select the label to be translated. Choose the language and click on “Translate Labels”. It will translate all or selected labels in selected languages. This may take little long to process.
Primary / default language is English.
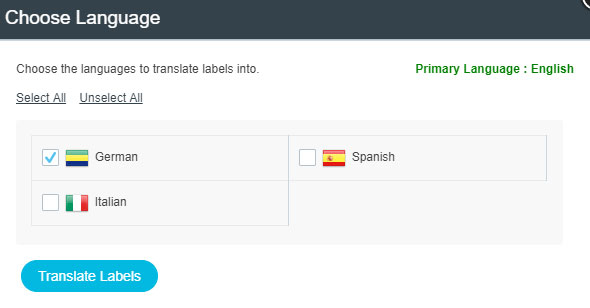
- Select All : This will select all the languages for translating.
- Unselect All : This will deselect all selections.
- Translate Labels : This button will start the process of translating.
- Primary Language : Shows primary language.
Add New Language Label
To Add a new language label is easy with a form shown below.
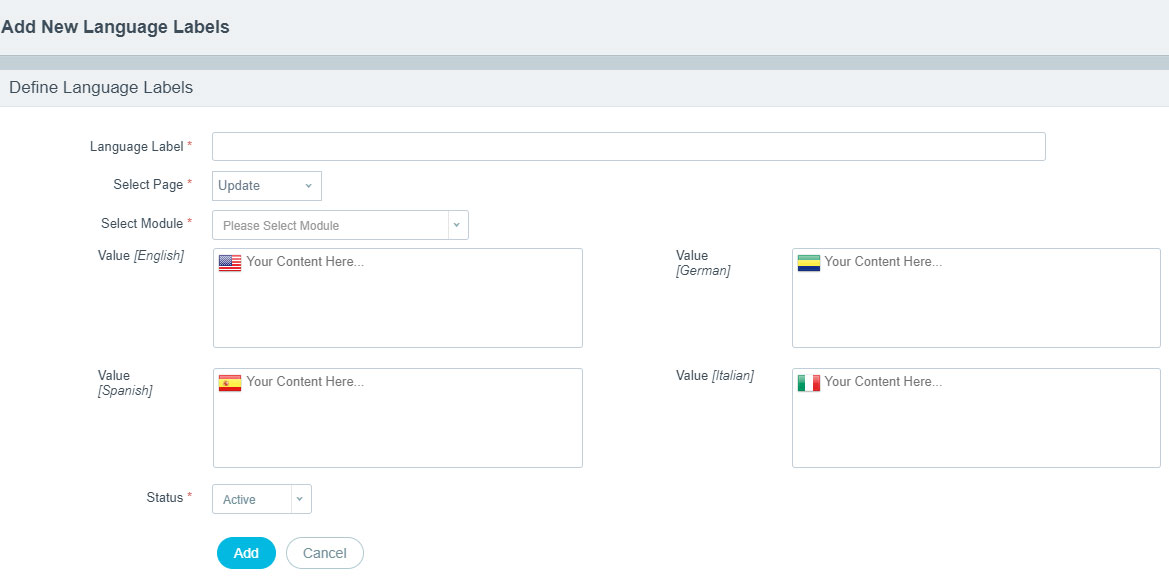
- Language Label : Add a label to identify the message. It will automatically add underscore(_) and capitalize it.
- Select Page : Choose the page where to shown this label from the drop-down
- Select Module : Pick the module name from the list
- Value [Language Name] : Write the actual message to be shown
- Status : Choose the status from Active and Inactive.
- Add : This will add the new label.
- Cancel : This will cancel the page and redirect user on previous page.
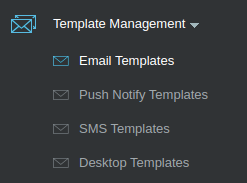
Template Management
-
Email Template
An email template is a preformatted and/or pre-written email that you can utilize to substitute with your own content so that you can swiftly and easily write emails.
Like any other templates, Email templates are also reusable (HTML) files used to build campaigns, send greetings, notifications etc.
Email templates can also contain variables which can be replaced by different field values so each email gets personal touch with professional image. Creating email templates for all festivals, occasions or different notifications saves a lot of time and timely emails can be sent to users.
Add New Email Template
Apart from predefined templates, user can add many templates as per the requirement for various occasions. Below screenshot shows
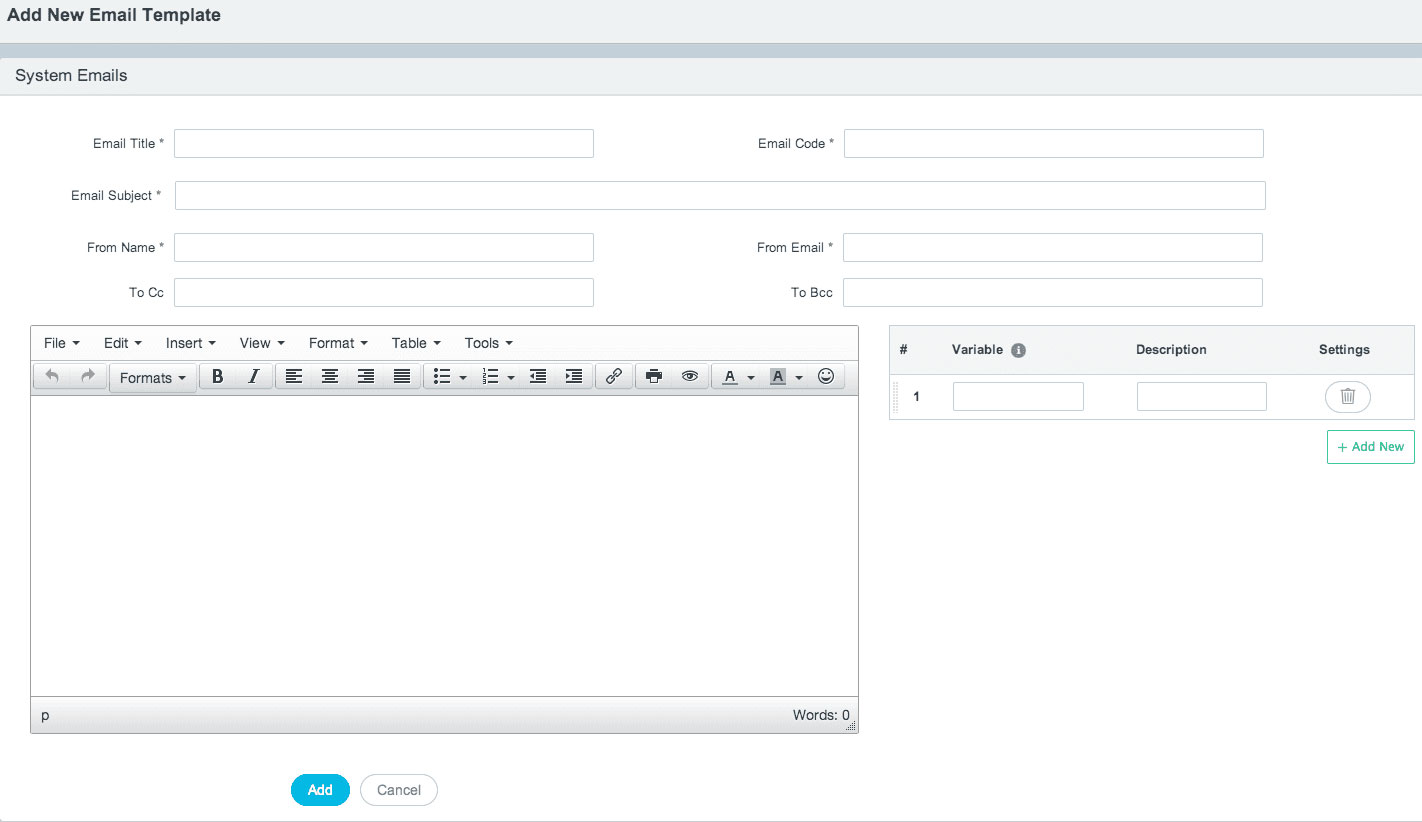
- Email Title : Name of the email used for identification
- Email Code : It is taken automatically but can be modified
- Email Subject : Subject of the Email
- From Name : Sender Name
- From Email : Sender Email Address
- To CC : If Receiver addresses are fixed then add it
- To BCC : If Receiver addresses are fixed but not to reveal, BCC option should be used
- Variable List : Variables will replace it with value of fields from database.
- Variable Name : Variable name should be precede and followed by "#" symbol.
- Description : for Informational purpose only.
- Settings : Will delete variable from list after confirmation
-
Push Notify Template
An Notify template is a preformatted and/or pre-written notification that you can utilize to substitute with your own content so that you can swiftly and easily write notification.Push Notify templates can also contain variables which can be replaced by different field values so each notification gets personal touch with professional image.
Add New Push Notify
Apart from predefined templates, user can add many templates as per the requirement for various occasions. Below screenshot shows
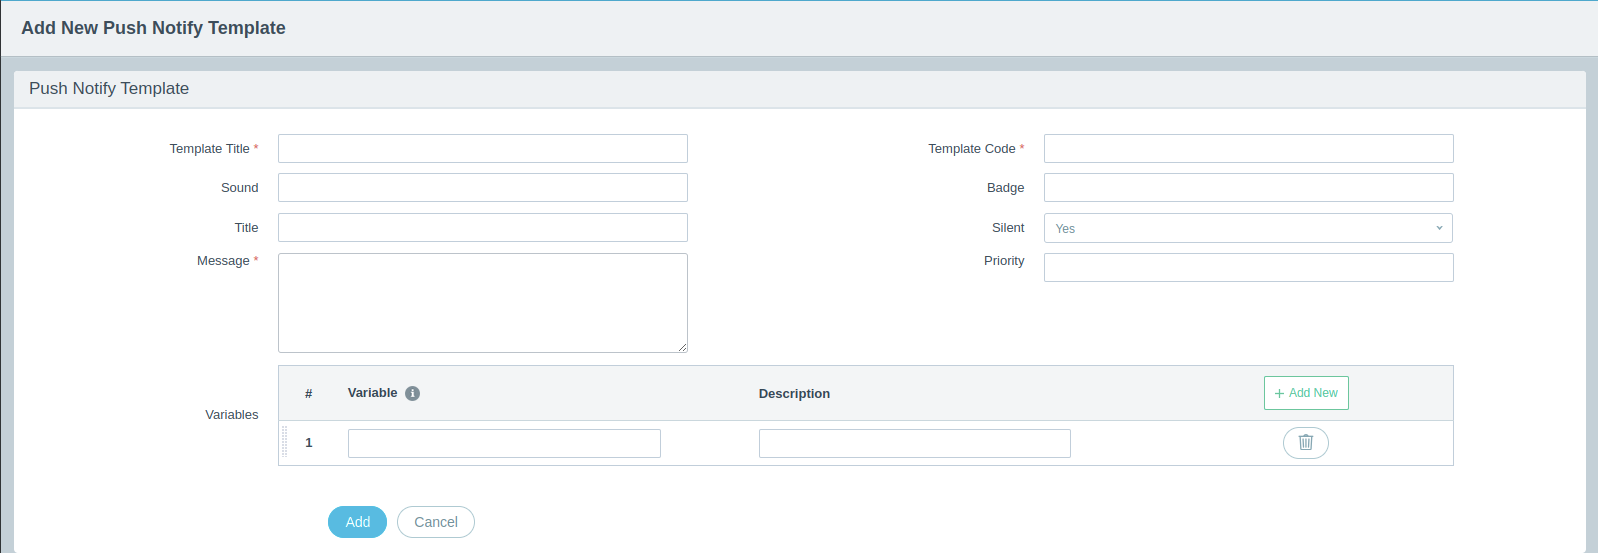
- Template Title : Name of the notify template used for identification
- Template Code : It is taken automatically but can be modified
- Sound : Give sound to the notify template
- Badge : Add badge for the notify template
- Silent :Choose if it should be silent or not
- Message :Write the message of the notify tempate
- Priority :Give the priority for your notify tempalte
- Variable List : Variables will replace it with value of fields from database.
- Variable Name : Variable name should be precede and followed by "#" symbol.
- Description : for Informational purpose only.
- Settings : Will delete variable from list after confirmation
-
SMS Template
An SMS template is a preformatted and/or pre-written SMS that you can utilize to substitute with your own content so that you can swiftly and easily write SMS.
Like any other templates, SMS templates are also reusable (HTML) files used to build campaigns, send greetings, notifications etc.
SMS templates can also contain variables which can be replaced by different field values so each SMS gets personal touch with professional image. Creating SMS templates for all festivals, occasions or different notifications saves a lot of time and timely emails can be sent to users.
Add New SMS
Apart from predefined templates, user can add many templates as per the requirement for various occasions. Below screenshot shows
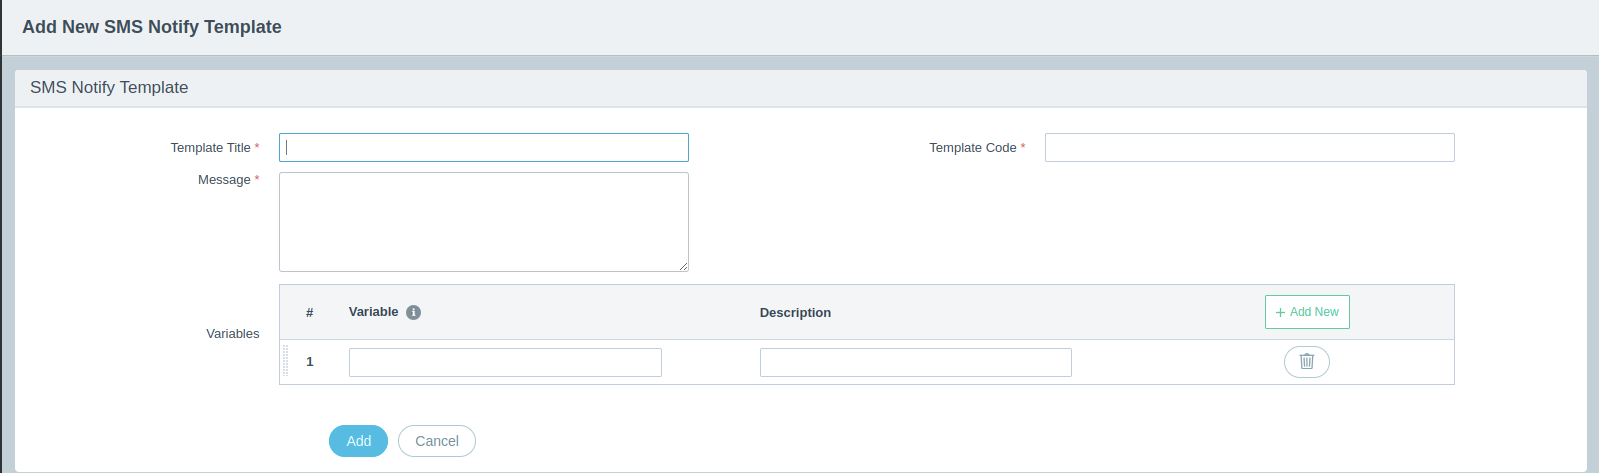
- Template Title : Name of the SMS template used for identification
- Template Code : It is taken automatically but can be modified
- Message :Write the message of the SMS tempate
- Variable List : Variables will replace it with value of fields from database.
- Variable Name : Variable name should be precede and followed by "#" symbol.
- Description : for Informational purpose only.
- Settings : Will delete variable from list after confirmation
-
Desktop Notify Template
An Desktop template is a preformatted and/or pre-written desktop notify template that you can utilize to substitute with your own content so that you can swiftly and easily write desktop notify template.
Desktop template can also contain variables which can be replaced by different field values so each Desktop template gets personal touch with professional image.
Add Desktop Notify Template
Apart from predefined templates, user can add many templates as per the requirement for various occasions. Below screenshot shows
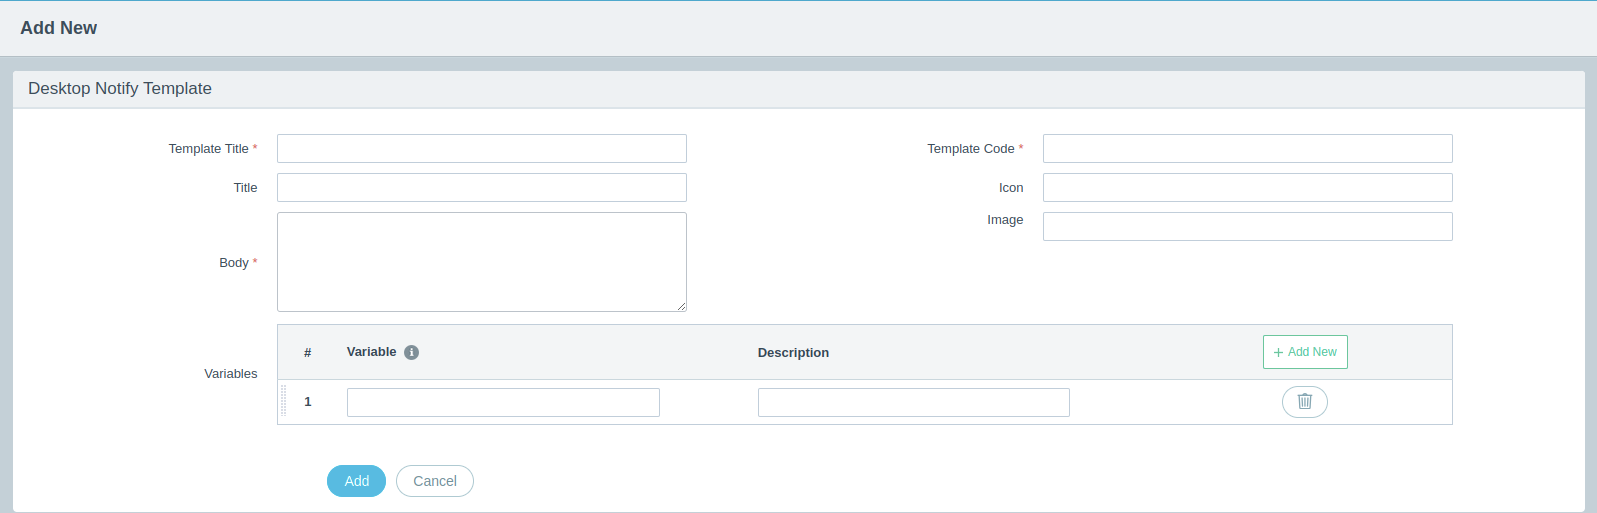
- Template Title : Name of the desktopro template used for identification
- Template Code : It is taken automatically but can be modified
- Title : Give title to your desktop notify template
- Icon : If you want to add Icon to your desktop notify template the you can add here.
- Image : If you want to add Image to your desktop notify template the you can add here.
- Body :Write the message of the tempate
- Variable List : Variables will replace it with value of fields from database.
- Variable Name : Variable name should be precede and followed by "#" symbol.
- Description : for Informational purpose only.
- Settings : Will delete variable from list after confirmation